| D3VE Specific Porting Guide |
| page-3 |
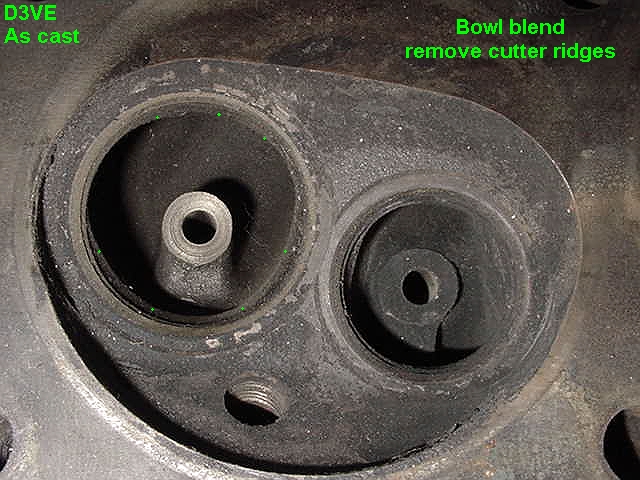
| It is difficult to articulate with words and 2 dimensional pictures the subtle shaping that occures in a port. But here goes. The area of the longside behind the valve guide should be left at the as cast height. The trenches should "Fall" in a plane that is consistant with the as cast roof angles. The so called trenches are actually the beginning of the long side or roof. The right side roof is slightly higher because of its proximity to water too. Do not raise the roof on the right side more than about .0625" or 1/16th:" from trench to thermactor roof bump.. I find it easier to raise the entire roof to the as cast height to the right of the thermactor boss. Then shape the new roof as needed. The area on the right side, where trench transitions to the right roof is very thin. don't get too aggressive here. The right side bowl from valve seat to trench angles in and water is close here too. You can remove about .050" to .075" and be safe. The corner radius where the right bowl wall meets your trench is thin when shaped correctly. (Marked with yellow information icon.) The finished right wall of the bowl should still angle in though. Do Not cut it vertically or you will hit water in the corner |
| One of the hardest proceedures you will have to do for good flow is to dig out the areas on either side of the valve guide boss. The reason being is the proximity to water on the right side of the guide. I suggest starting with a aerosol can spray tube and marking off .1" to .125" (1/8th"). Be exact about this as it will be important later on. Start by streamlining the guide boss from as cast to the shape you see here. You want to remove the ring around the actual valve stem passage. Do Not raise or dig out the trenches yet. After you have done this raise the right side trench uniformly to the same maximum height it is as cast. (Flat surface for drilling a small hole) Now take a small drill bit that is the same diameter as the spray tube and begin to drill a small hole, (Area marked with red square) the depth of this hole will be the amount marked off on the spray tube. This is a safe amount of material to remove from this area. Use this as a guide to tell you when to stop raising the trench on the right side. Once the trenches are done raise the guide boss itself so that its protrusion is minimal compared to the trenches. |
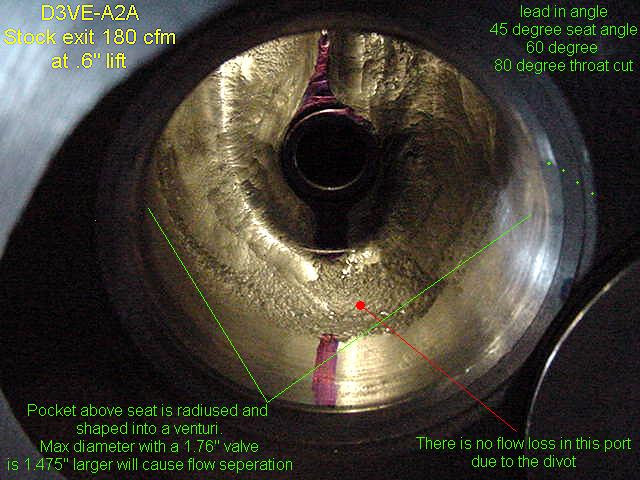
| If your port is similar in shape to these pics you can expect around 170 to 180 cfm. You needn't do anything more than polish the main passage and the bumps smooth. Polishing the floor isn't necessary... The area on the right side roof adjacent to the thermactor roof bump should be the same height as the bump itself. |
| With careful attention to short turn shape and valve unshrouding 200+ cfm at .6" lift is possible. more details coming soon... |