| pg-8 |


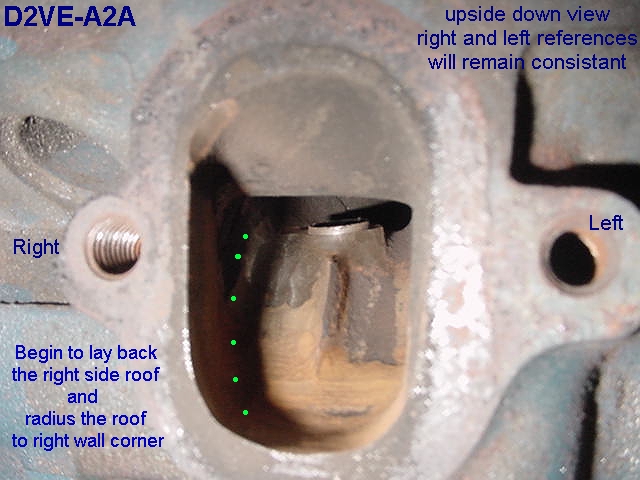
| Turn the head right side up and begin to lay back the exhaust bolt hole bump / boss. For now just lay back to as cast port wall. This is usually when I rough in the port width to the gasket that came with the headers I intend to use. As the header flange is usually wider than the gasket opening there is some room to play here. Again I have found that most header flanges allow more lattitude on the left side than the right. I usually begin by laying back right wall to the edge of the CJ manifold outline Lightning rods will have to do. |
| Step 6 |


| This view shows the exh. bolt bump / boss layed back and the right side exit widened and wall made vertical. This isn't finalized yet. When you begin to lay back the right side roof you will need to radius the roof / wall corner. I work the burr out to the exit while I'm grinding and remove the lip on the right upper corner roof |
| Notice the trough to the rear of where the bolt boss used to be. As you attempt to pull the burr toward the exit you will get a feel for how the flow will follow the roof contour. I turn the head upside down to do this. |
| With the exit upside down you can begin to lay back the right side port roof and radius the corner. The lip hasn't been removed yet in this view. Note position of blue diamond. The right side upper corner should look more like the left. These operations are done concurrently You will have to blend all of your modifications until the port has the desired final roof width and wall to roof radius. This is difficult to articulate. You just get a feel for it. |


| Porting guide 429/460 pictorial |
| Again further research has shown that removal of the exhaust bolt hole bump is NOT necessary. See the Stock exit link for more information 12-02 |